This is part 1 of a series on creating a Chrome extension for use by members of a development team. We use a version of this tool here at WegoWise.
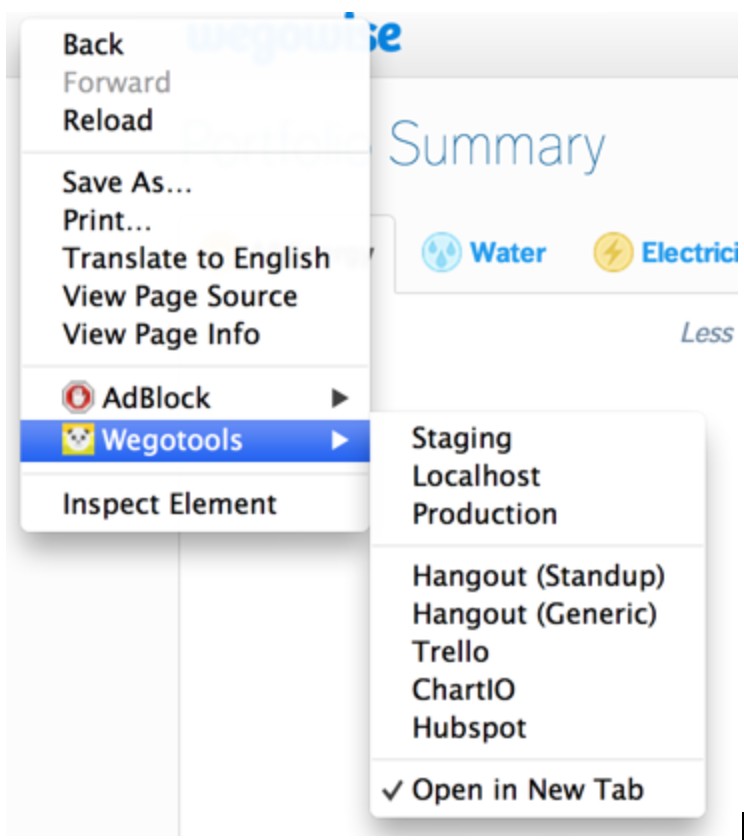
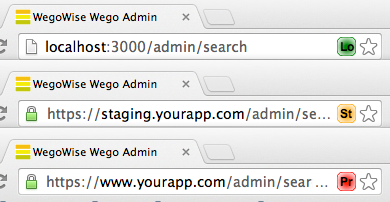
As a developer I often need to switch between multiple environments with the same url. This usually involves cutting and pasting a url into a new tab then changing the domain. Knowing that Google Chrome allows you to easily write extensions that can interact with web pages I decided to see if I could make my workflow a little bit easier. The goal of this minor project was to be able to change just the domain part of a url from a right click in a Chrome browser.
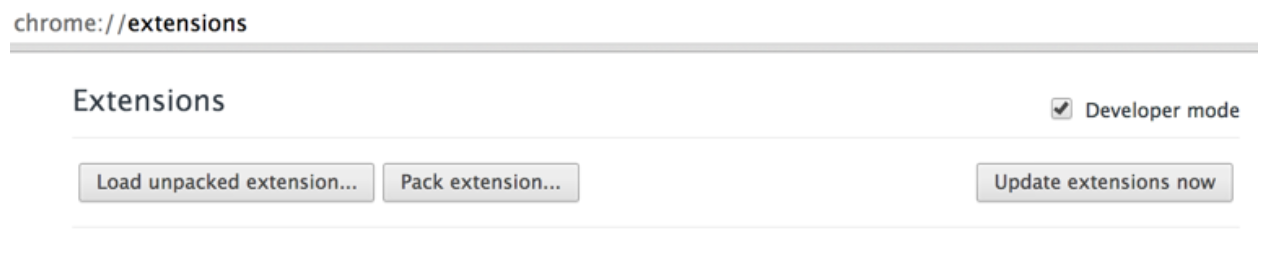
The first step is to turn on developer mode on the chrome://extensions page in the upper right hand corner.
An extension is defined by a file called manifest.json which should be created in the root directory of your chrome extension project. The manifest defines the properties and permissions of your chrome extension.
Most of the parameters are self explanatory, however there are a few items that are of particular interest.
In our case we’re going to be adding right-click menus (i.e. contextMenus) and we are going to be manipulating tabs. Chrome extensions can have very intimate knowledge of your browsing history and general use of the application, so Google (and I) feel it’s important that the permissions are spelled out.
Icons
We’re only going to use two icons in our application, a 16x16 icon that will appear in our right-click menu and a 128x128 icon that will be displayed on the extension.

Background
We specify a script file that will be loaded as a background process, which I'll cover in a little bit.
Creating the context menus
A context menu is created by using the Chrome API.
Context menus are added in the order in which they're called in your javascript. The id identifies which contextMenu has been clicked. It's important to set this if you need to have custom behavior for a particular menu as Chrome will set a random id if one is not specified. title is simply the words that will appear in your contextMenu. The onclick parameter is the function that will be called when the menu is accessed, which you will note is not in quotes since it's referencing the function itself.
You can also add radio buttons or checkboxes to the menu. In our case we're going to specify whether the existing tab's url should be changed by setting a variable, but first let's put in a separator:
And finally the checkbox:
The event functions go into the .js file as well. Our example code for setting the checkbox event is as follows:
You'll notice that we will use the built-in checked property for the checkbox and have access to both the contextMenu and the currently displayed tab. If this were a production app you would want to create properly encapsulated javascript objects, however in our simplified case we'll just set a global variable.
The onclick handler for the context menus takes the same arguments as the checkbox function. We'll use the id that we assigned to map into a javascript object that contains our domain information.
The loadInSeparateTab variable is used to determine whether we should open a new tab or use the existing tab. The domain part of the url is pulled from the menus object by the tab id.
Loading the extension
To deploy our code choose 'Load unpacked extension...' on the extensions page and select the directory that contains the extension code. If everything is correct when you right-click in your browser you should see 'Wegotools' and below that choices for Staging, Localhost, and Production as well as the "Load in separate tab" checkbox. Regardless of success or failure you'll see an entry for your extension as long as your manifest file is correct.

If you need want to inspect your running extension click on 'background page' which will open up a javascript console that displays any errors or console messages just like the standard Chrome developer tools.
Next Steps
The next part of this series will cover the creation of a pageAction which will show an icon in the location bar when we're on one of our domains.
The final installment will cover deployment of our extension.